Automatically Turn YouTube Videos Into Blog Posts (Fully Automated Workflow)

If you publish videos, you’re sitting on untapped SEO value. This step-by-step tutorial shows how to use Video To Blog to automatically detect new YouTube uploads, convert them into optimized blog posts, and publish them directly to your website — no manual copy/paste, no reformatting, no extra work.
Why automate YouTube → blog
Converting videos into blog posts automatically multiplies your distribution: search engines index long-form text better, your site gets fresh content consistently, and you drive traffic back to videos and product pages without extra effort.
What you’ll need
- Video To Blog account (there’s a free trial available)
- A YouTube channel URL
Step-by-step setup
-
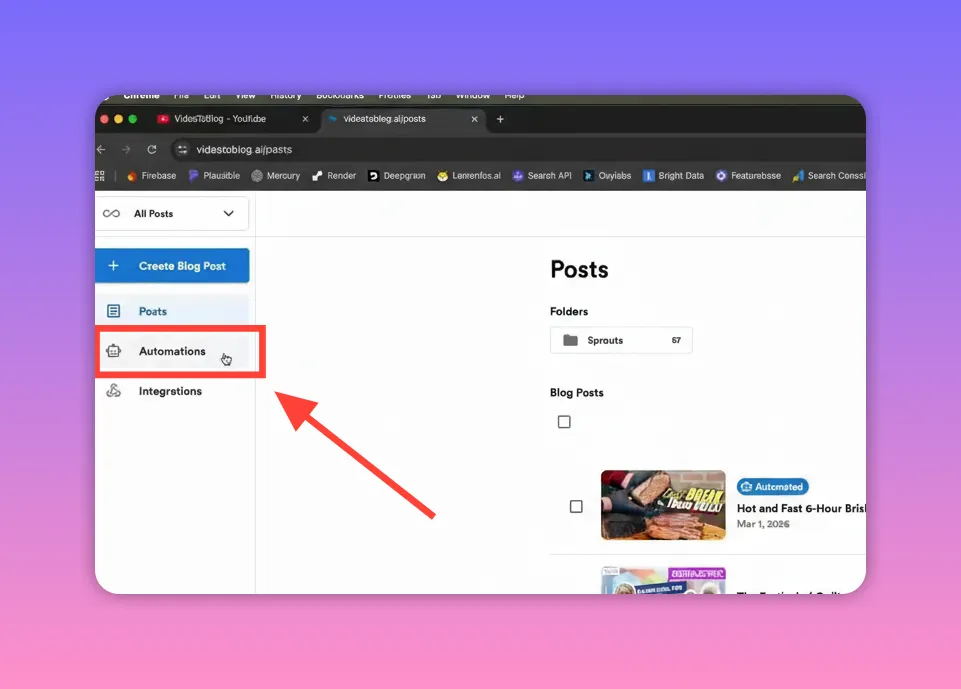
Open Video To Blog and sign in
Go to videotoblog.ai and sign into your account or start the free trial. From the dashboard, open the Automations tab to create a new automation.
-
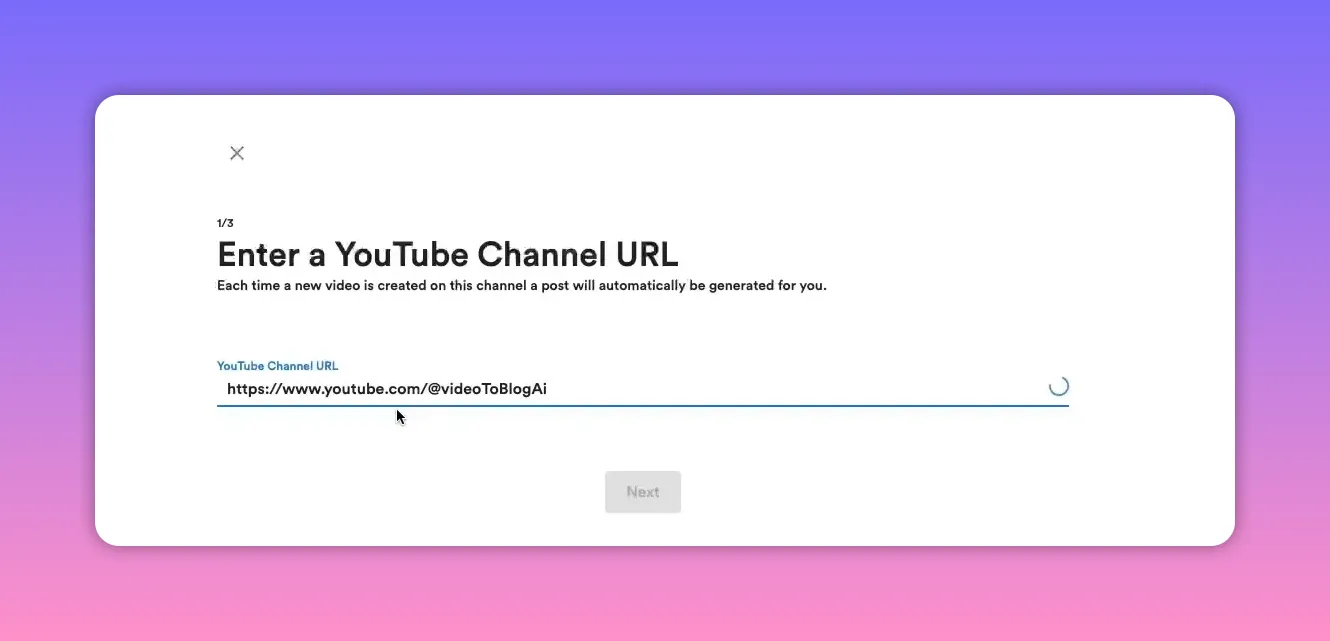
Create a new automation and add your YouTube channel URL
Click Create automation. Paste your YouTube channel URL when prompted. This tells Video To Blog which channel to monitor for new uploads.
-
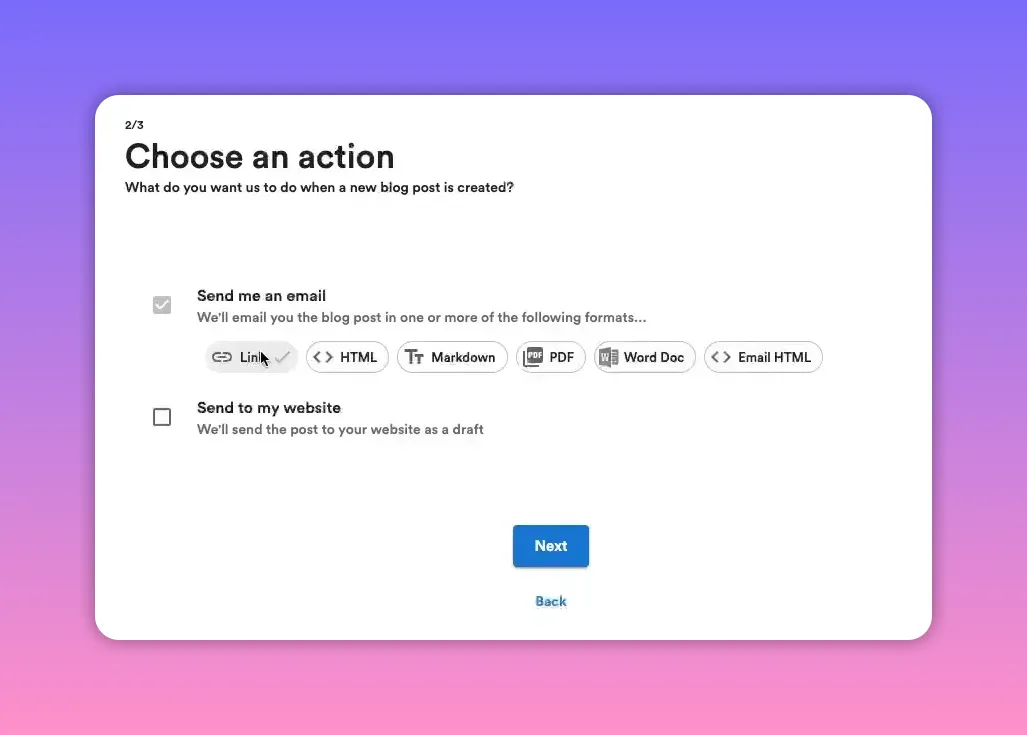
Choose how you want to receive the generated post
Video To Blog will always send a notification email when a post is created. You can also choose the output format (HTML, Markdown, PDF, Word, email, etc.). For most workflows a link or HTML is sufficient.
-
Connect your website (send posts directly to it)
If you want posts published automatically, check the option to send the post to your website and select the site from the list. If your site does not appear, go to the Integrations tab and connect your platform first.
-
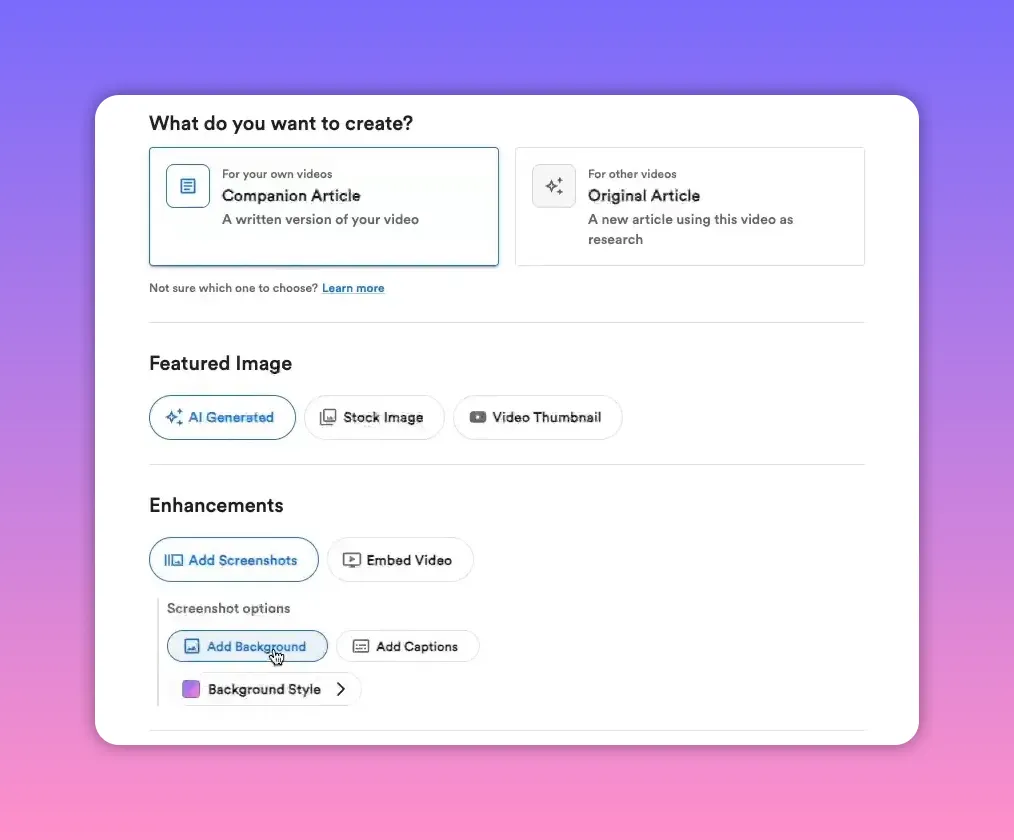
Configure article options
Now choose how each post should be generated. Key options to set:
- Custom instructions — optional prompts to customize tone, keyword usage, or structure.
- Article type — Companion article for your own videos (keeps content aligned with the original), or Original article to create a new piece based on a video you don’t own.
- Featured image — enable AI-generated images if you want an auto-created thumbnail for posts.
- Screenshots — include these for screen-share videos to illustrate steps or UI calls.
- Embed video — include the original YouTube video in the post so readers can watch inline.
For most creators, pick Companion article, enable screenshots and an AI featured image, and embed the video.
-
Create the automation
After selecting your preferences, click Create automation. The automation will now run whenever a new video is published on the linked channel.
Troubleshooting & tips
- Site not listed? Connect your website via the Integrations tab first, then return to Automations.
- Companion vs original: Use Companion for videos you own to keep copy aligned. Use Original if you want a fresh article derived from someone else’s video research.
- Include screenshots for screen-share content — they make the post more useful and scannable.
- Customize with instructions if you need a specific tone, keyword density, or structure (for example, include an H2 checklist or a TL;DR section).
SEO and formatting recommendations
- Use the video title (or a close variation) as the blog title to keep consistency and capture keywords.
- Embed the video near the top of the article to increase session time and provide immediate context.
- Add screenshots and captions to help readers and search engines understand the content structure.
- Enable internal links and cross-link related posts to boost on-site SEO.
- Use custom instructions to optimize generated content for specific keywords or audience needs.
Why this works
Automating video-to-blog eliminates repetitive work and ensures every piece of video content becomes searchable, indexable, and discoverable by people looking for answers on Google. Consistent publishing builds authority and drives compound traffic growth over time.
Next steps
- Set up the automation following the steps above.
- Test with one new upload to confirm the post is generated and published correctly.
- Fine-tune custom instructions and writing preferences for your brand voice.
Final note
Video To Blog can turn each new upload into a ready-to-publish article, complete with featured image, screenshots, and embedded video. Once configured, it runs automatically so you can focus on creating more content while your website gains steady, SEO-friendly posts.


