How to Instantly Convert Transcripts into SEO Optimized Blog Articles with Video To Blog
Apr 7, 2026 • 3 min read
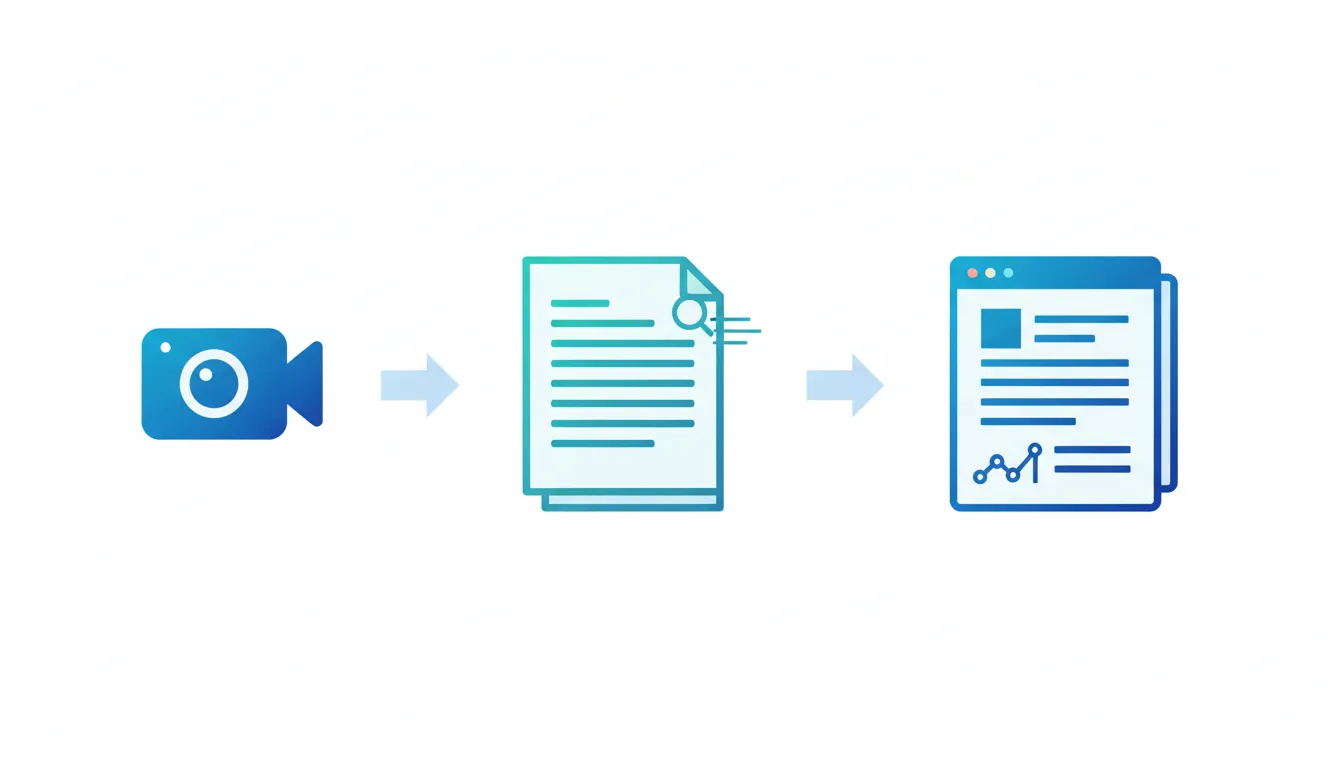
If you already have content in video form (or you can get a transcript from it), you are sitting on a huge SEO opportunity. The challenge is turning that transcript into something that is actually publish-ready: well structured, easy to read, and optimized for search.
Video To Blog makes that conversion fast. You upload your transcript, choose a few options, and an SEO optimized blog post is generated in about a minute or so. From there, you can review, tweak, and export it to your website.
What you need before you start
To convert a transcript into a blog post, you just need:
- A transcript file (the tool supports common transcript file formats; the example uses a text file).
- Access to Video To Blog: https://www.videotoblog.ai
Video To Blog also offers a free version that can generate one blog post per month, which is perfect if you want to test the workflow before committing.
Step-by-step tutorial: Convert any transcript into an SEO blog post
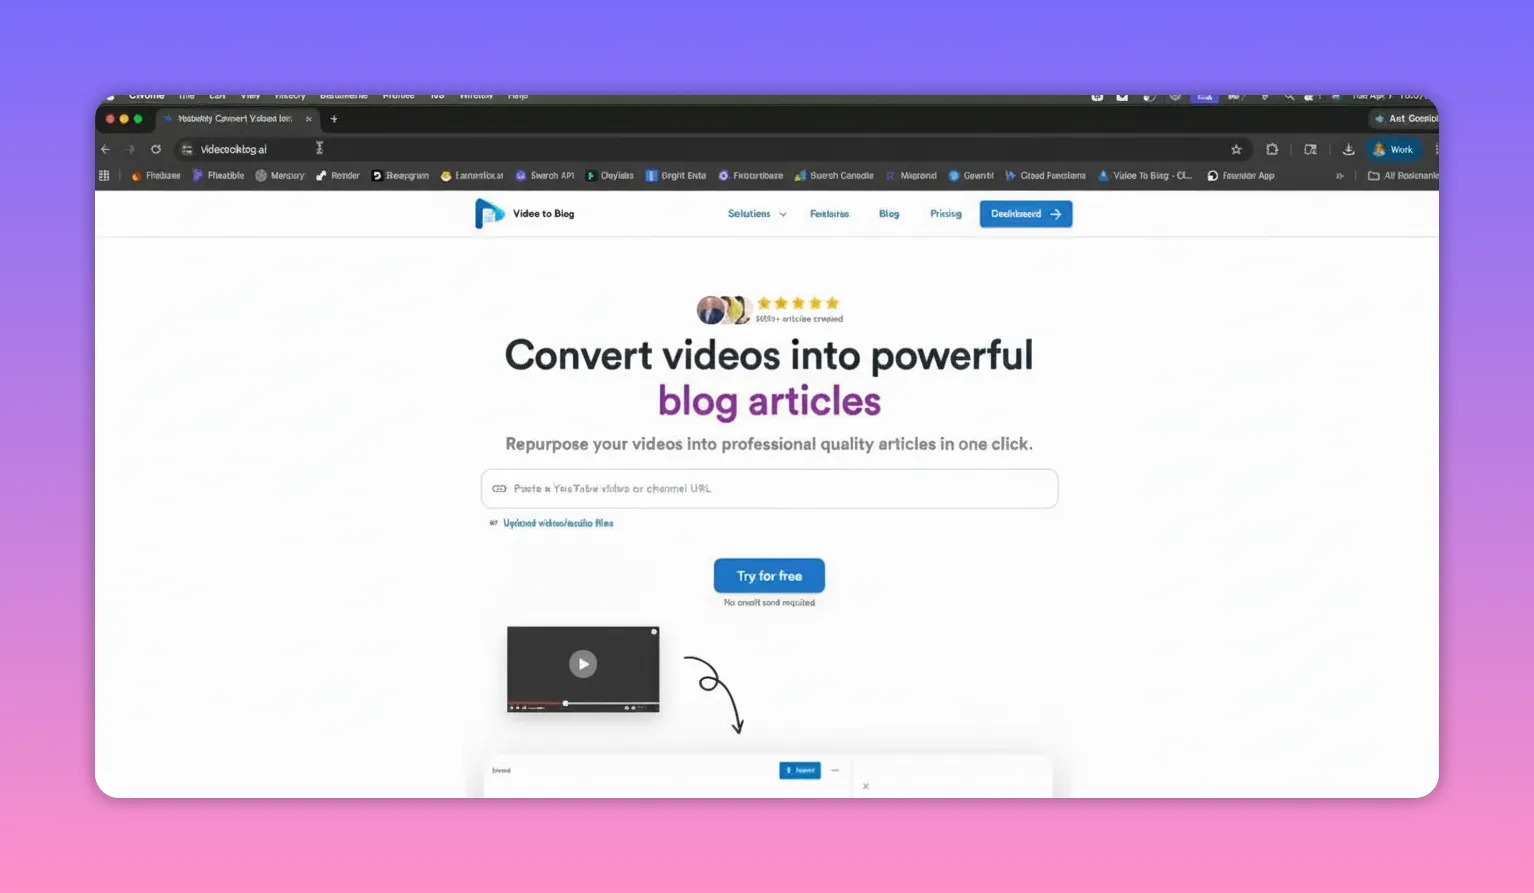
Step 1: Go to Video To Blog and create (or log into) your account
Start by heading to https://www.videotoblog.ai.
If you do not have an account yet, create one. There is a free tier for generating one blog post a month. If you already have an account, log in and jump into your dashboard.
Step 2: Create a new blog post
Once you are in the dashboard, click Create blog post.
The workflow is designed around uploading content (like a transcript), so you are not building from scratch.
Step 3: Upload your transcript file
Next, choose Upload transcripts, then select your transcript file.
The exact format can vary. In the example, the transcript is a text file, but the tool works the same way regardless of transcript file format.

Step 4: Choose your generation settings (companion article + feature image)
After uploading, Video To Blog asks you to configure how your blog post should be generated.
In the example workflow, two key options were used:
- Companion article: left selected because the transcript came from the author’s own video and a written version was desired.
- AI generated feature image: enabled so the resulting blog post includes an image that looks good right away.
These are simple, practical defaults that help your post feel complete instead of like raw text.
Step 5: Click “Create blog post” and let it generate
With your settings in place, click Create blog post.
The system uploads your transcript, sends it to AI, and begins generating your article. In most cases, it takes about 1 to 2 minutes to complete the blog post (the example run finished even faster, roughly tens of seconds).
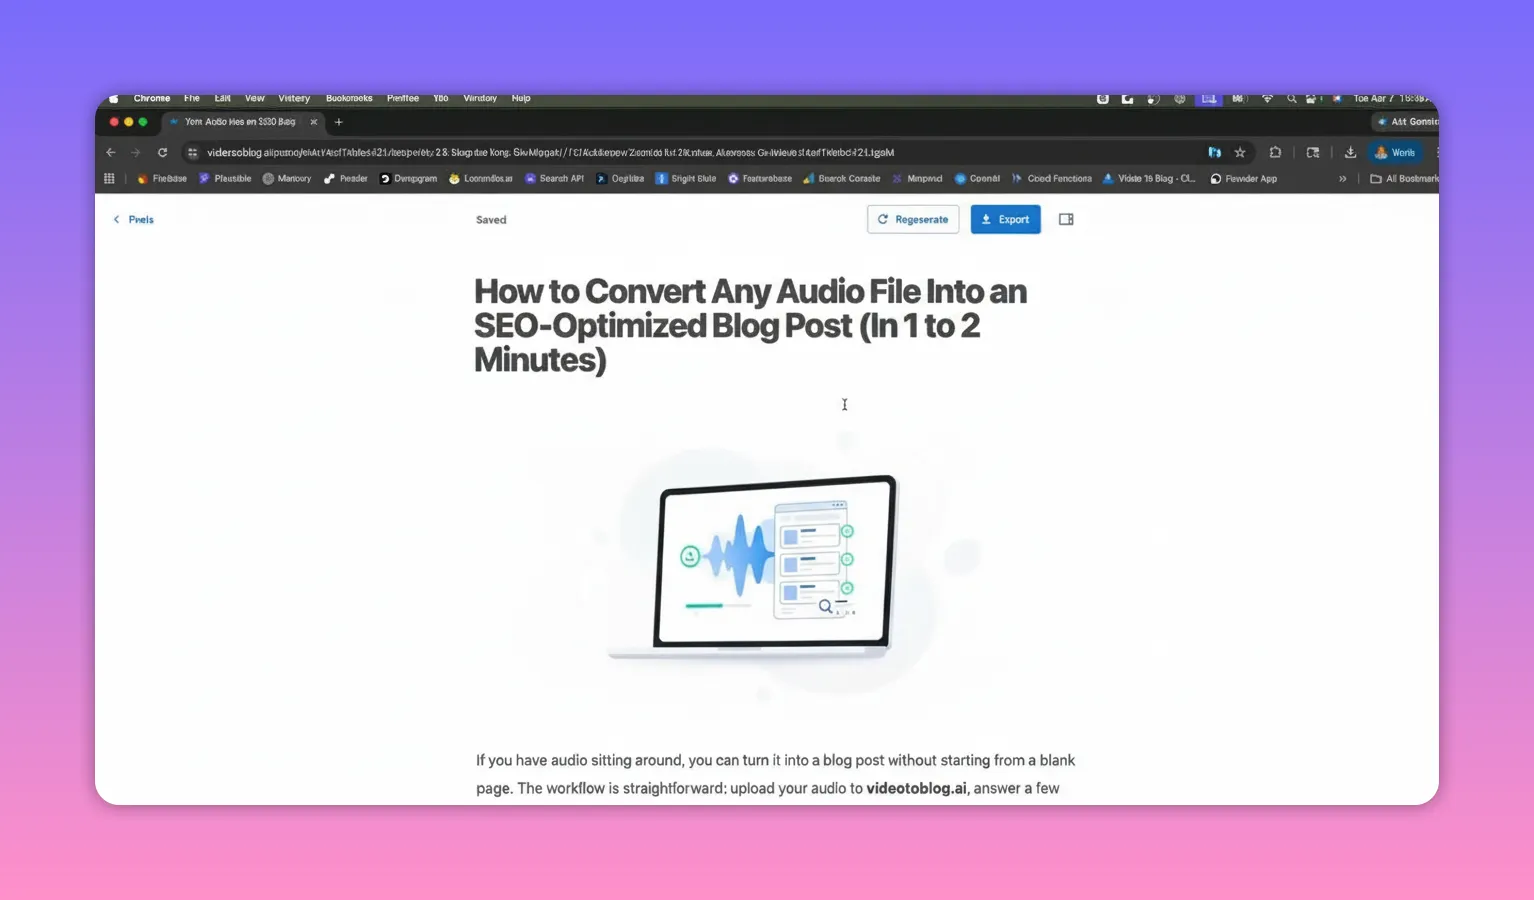
Step 6: Review the generated blog post (including SEO metadata and score)
Once generation finishes, you will have your blog post ready to read.
The post includes an AI generated image (when selected) and a full article layout that is easy to scroll through.
After that, check the sidebar area to see what metadata was generated. Video To Blog’s output is described as SEO optimized, and you can also review the blog post score and related details before you publish.
Step 7: Edit for accuracy and your voice
Even with strong automation, it is still smart to read through carefully. The example approach is straightforward:
- Read the post closely
- Tweak and edit where needed
- Confirm the final formatting feels right for your site
This is the step that turns “generated” into “ready to publish.”
Export your blog post to your website
After reviewing and editing, export is where you take the output live.
Video To Blog supports multiple ways to move your post to wherever you publish. You can export directly to your site, and depending on your platform, you can download your blog post in formats like:
- HTML
- Word document
The platform also mentions support for major hosting options like WordPress, Medium, and other major site hosting platforms.
Why this workflow is so fast
The biggest win is how quickly you can move from transcript to something structured and usable.
- You do not have to outline or rewrite from scratch.
- The AI generates a complete blog post layout quickly (often in well under a couple minutes).
- You can review SEO-related metadata and scoring before exporting.
That means you can repurpose existing spoken content into SEO-friendly written content without spending hours manually turning transcripts into articles.
Get started
To convert your next transcript into an SEO optimized blog article, use Video To Blog. Upload your transcript, choose your companion article and feature image options, generate the post, review the SEO score, then export to your website.
Done well, this is one of the easiest ways to turn your existing content into more searchable, more shareable pages, without turning writing into a full time job.


