Convert YouTube Videos into SEO-Friendly Blog Posts (Full Demo)
Jan 13, 2026 • 3 min read

Repurposing video content into written articles is one of the fastest ways to increase reach, boost SEO, and get more mileage from every piece of content you create. The process below walks through a streamlined workflow that turns any YouTube URL into a structured, publish-ready blog post—complete with screenshots, an AI-generated featured image, image captions, metadata, and export options for WordPress, Medium, and more.
What this workflow does for you
- Turns spoken content into readable, SEO-optimized articles without manual copy-pasting.
- Preserves visuals by adding screenshots and an embedded video so readers can jump between text and video.
- Generates metadata and alt tags so posts are ready to publish and index.
- Saves time—create a full draft in minutes and then polish for tone and SEO.
Step-by-step: From YouTube link to draft
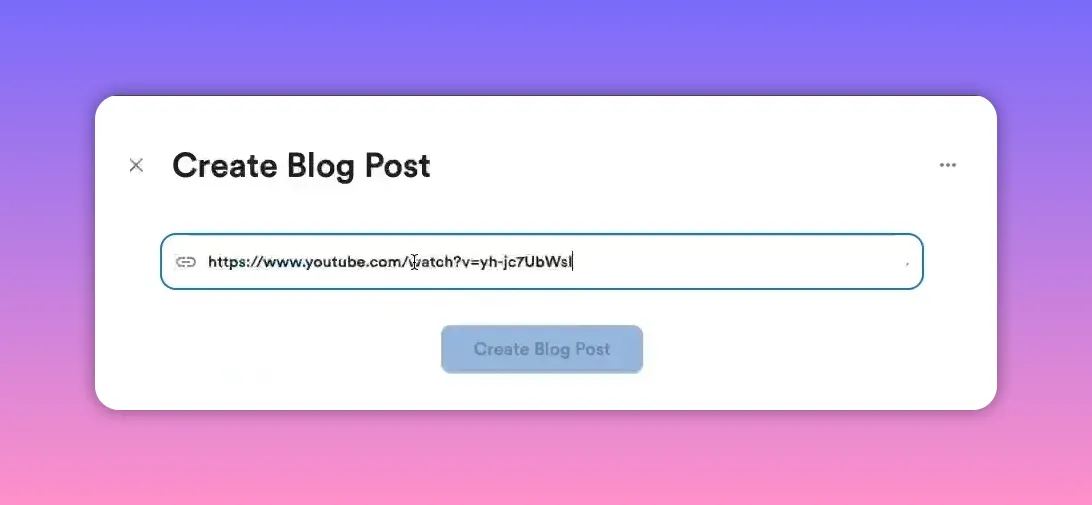
1. Grab the YouTube URL and paste it into the Video To Blog
First, Copy any YouTube video URL. Then, head over to Video To Blog and paste it in. If you don't already have an account, don't worry, you can create one for free to test it out.
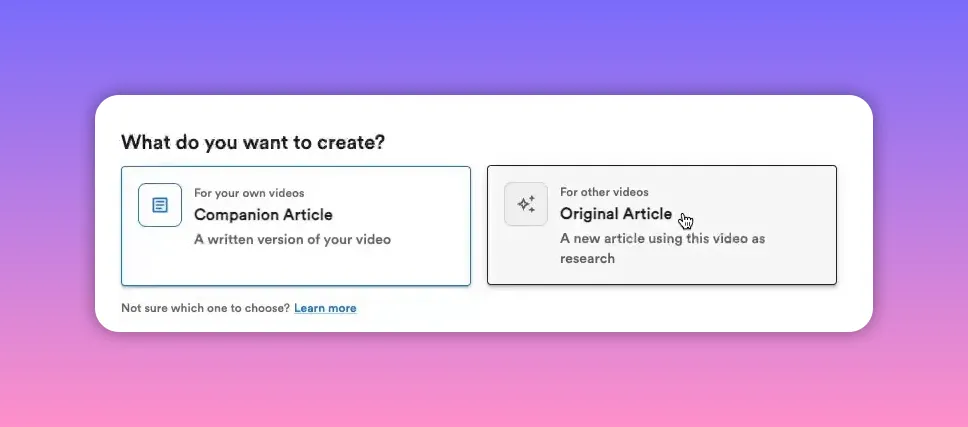
2. Choose the right article type
Pick between two modes:
- Companion article—a blog version of your own video, keeping the structure and intent aligned with the original content.
- Original article—useful when you want to treat the video as research and generate a fresh article with your own angle.
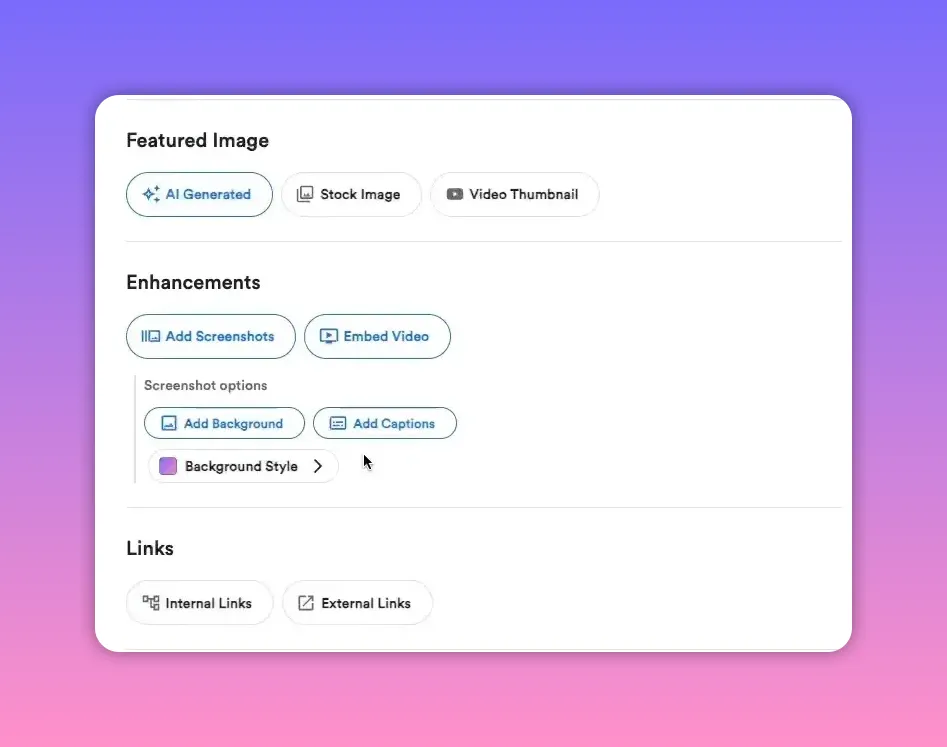
3. Configure visuals and extras
Options you'll typically want to enable:
- AI-generated featured image for a polished thumbnail or header image.
- Embed the video so readers can view it inline with the article.
- Screenshots with captions and background—especially helpful for screen-share tutorials.
- Optional: add links, set writing preferences, SEO tweaks, or custom instructions.
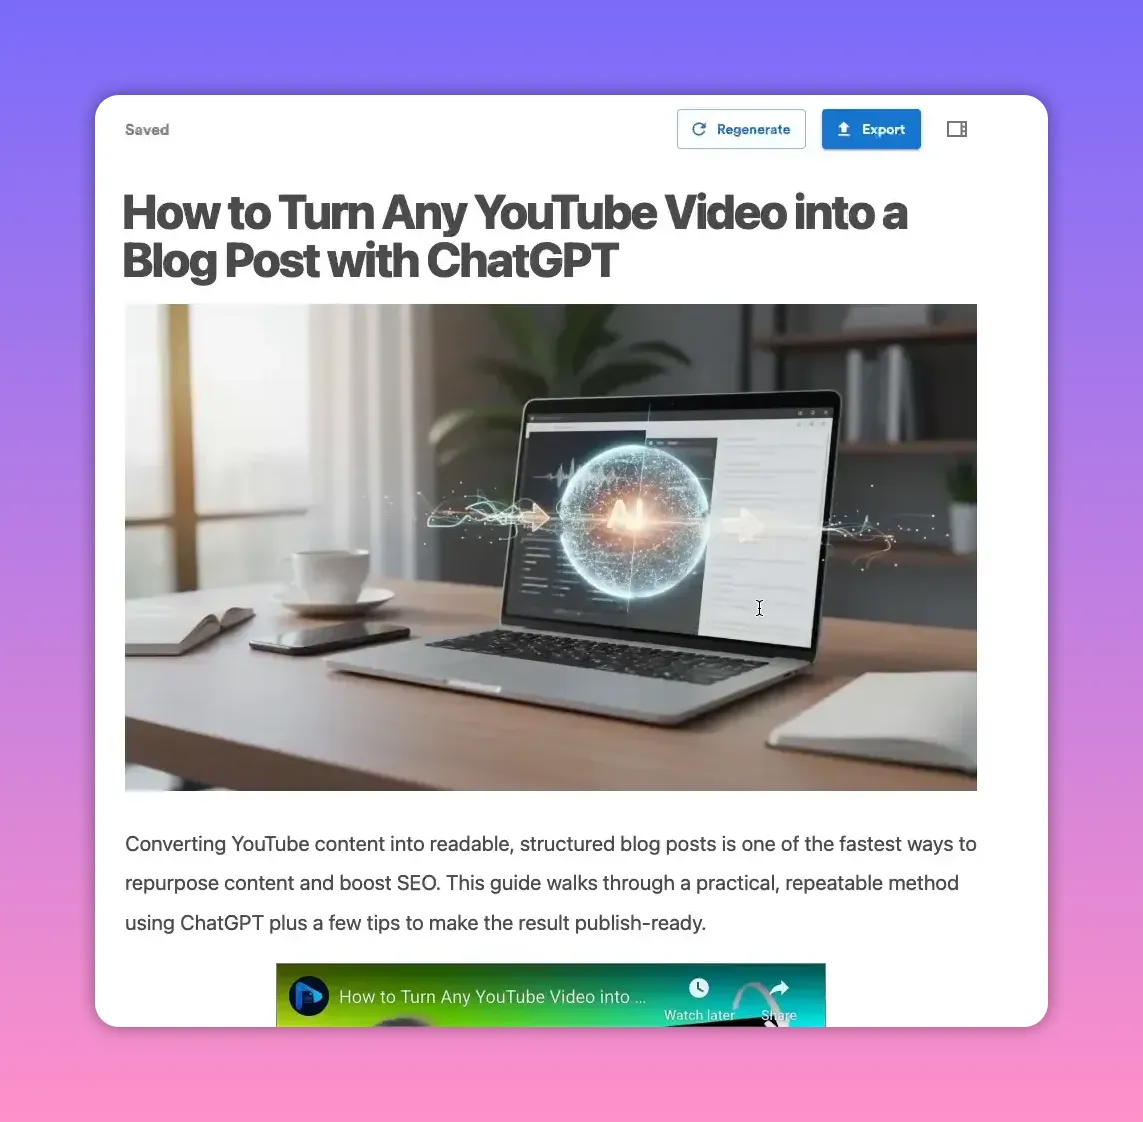
Generation: How long it takes and what you’ll get
A full draft typically generates in one to two minutes, though it can occasionally take a little longer. The output includes a structured article with headings, images, captions, and suggested metadata along with any other enhancements you specified like screenshots or AI generated image.
Edit and polish: Make the draft yours
The generated draft is purpose-built to publish, but a quick pass improves clarity and brand voice. The editor functions like a normal document editor—add or remove images, crop, annotate, and edit text inline.
Crop and remove unwanted elements
Screenshots are usually accurate, but you might want to crop out face cams or other distractions. Cropping is quick and intuitive.
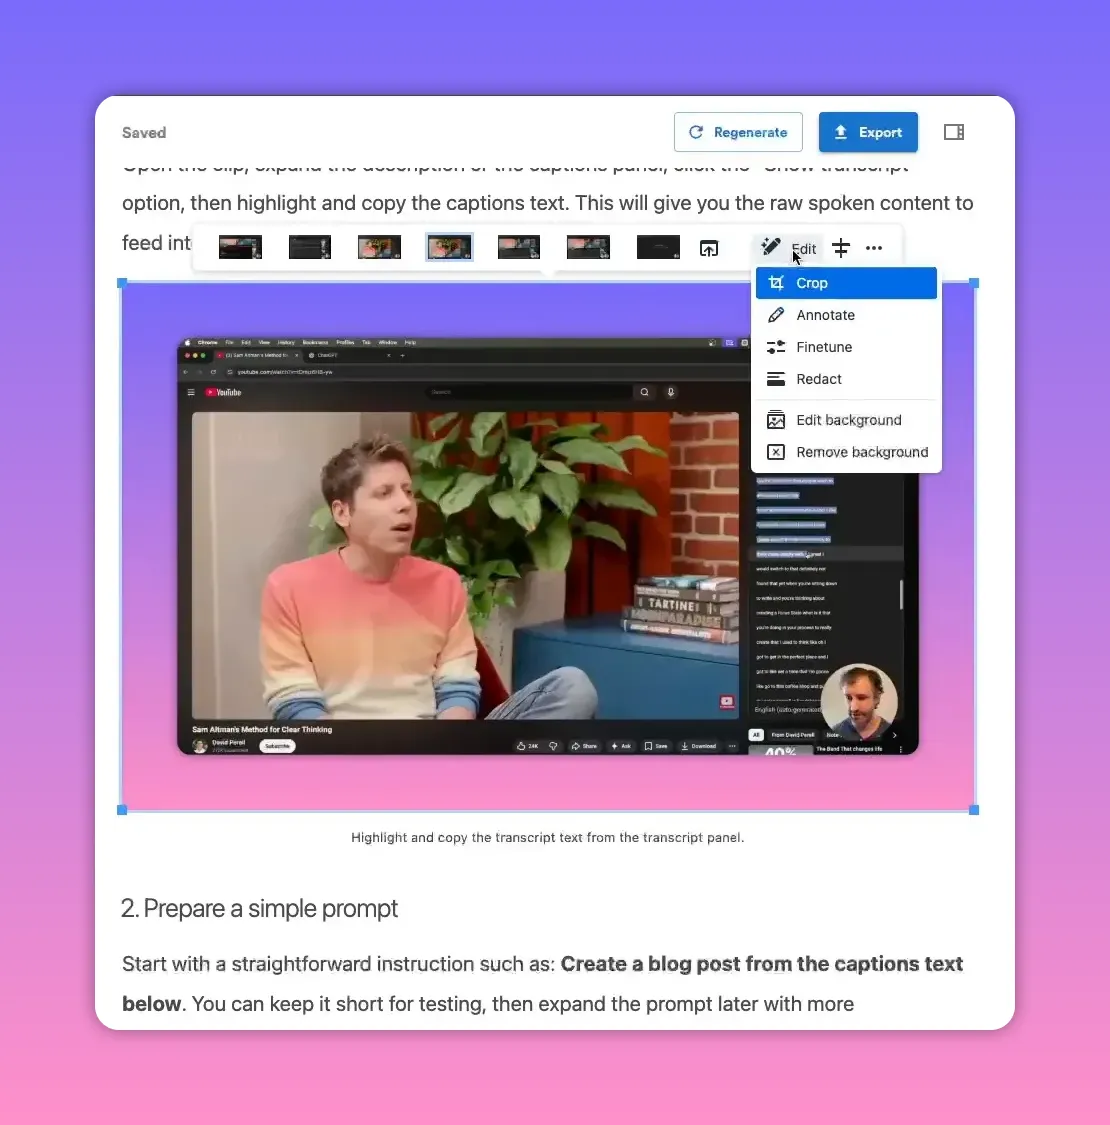
Annotate screenshots and add clarifying text
Annotating is especially useful for tutorials. Add short notes or arrows directly on screenshots to highlight the exact step you’re referring to.
Check and refine generated text
Read through headings, body copy, and any automated suggestions. Replace or expand sections where you want a stronger call to action, a different tone, or more depth on a topic.
SEO basics that are handled for you
The workflow automatically generates:
- Alt tags for images—important for accessibility and rankings.
- Meta title and description—ready to export with your post.
- Readable structure—headings, lists, and internal link placeholders.
When the platform shows a high score (for example, 100), it indicates the post has strong structure, readability, images, and metadata—making it closer to publish-ready from an SEO standpoint.
Export and publish
Multiple export and integration options are available:
- Direct publishing to WordPress, Medium, Blogger, and more.
- Download as HTML for manual uploads.
- Export as Word, PDF, or email HTML for newsletters or long-form downloads.
Practical checklist before publishing
- Confirm article type (companion vs original) matches your goals.
- Review and adjust screenshots, crop or remove face cams if needed.
- Annotate screenshots where clarification helps readers.
- Add important external links and calls to action.
- Double-check alt tags, meta title, and meta description for SEO.
- Run a quick readability pass and publish when ready.
Tips for getting the most value
- Repurpose strategically: Turn every how-to, demo, or explainer into a companion article to reach readers who prefer text.
- Use original mode when the goal is to synthesize multiple sources or create a unique angle.
- Keep visuals consistent: Use a branded AI-generated featured image and consistent screenshot styling for a professional look.
- Polish the first and last paragraphs: These are the highest-impact areas for SEO and conversion.
Converting video into articles streamlines content production and increases discoverability. With a few clicks you can generate a structured article, polish it quickly, and publish in the format that fits your audience—saving hours of manual work.
Try the workflow to see how much faster you can turn video content into SEO-friendly blog posts and scale your content production.
Rather watch instead?
Check out the entire video demo here...


